OpenFileDialog Control
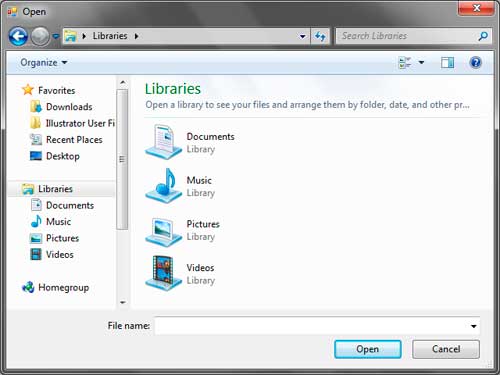
The Open File Dialog control (System.Windows.Forms.OpenFileDialog) allows you to open and read file contents such as texts from text files. The dialog allows you to browse your file system and pick a directory. You can type the name of the file that exist in the current directory or you can type the whole path of a file or directory in the File Name text box located at the bottom of the dialog.

The following table shows some useful properties of the OpenFileDialog control.
| Property | Description |
|---|---|
| AddExtention | Specifies whether to automatically add an extension when the user omits the extension of the file he or she chooses. |
| CheckFileExists | Specifies whether to initiate a warning if the user types a file that does not exist. |
| CheckPathExists | Specifies whether to initiate a warning if the user types a path that does not exist. |
| DefaultExt | The default extension to add when the user does not indicate a file extension. |
| FileName | The file selected by the user. This can also be the default selected the file when the dialog shows up. |
| FileNames | A collection of files that the user picked. |
| Filter | Allows you to add a filter which are a special string indicating which types or files are only allowed to be opened by the user. |
| FilterIndex | If multiple filters are present, this indicates which filter shows as the default starting with index 1. |
| InitialDirectory | The initial directory that the OpenFileDialog will show. |
| Multiselect | Tells whether the user can select multiple files. |
| Title | The title of the dialog. |
The AddExtention property automatically adds an extension when the user does not indicate the file extension of the file name. The extension to add is specified by the DefaultExt property. The CheckFileExists and CheckPathExists methods are recommended to be set to true so the dialog will issue a warning message if it cannot find the specified file or directory. The InitialDirectory property specifies the initial directory that the dialog will show when you open it up. The Title property is the title of the dialog located at the title bar. The FileName property is the selected file selected or specified by the user. You can allow a user to select multiple files by setting the Multiselect property to true. You can then use the FileNames property to get the collection of selected file names.
Filtering Files
We can filter the files to be shown by their file types. We use the Filter property which accepts a string containing a special pattern. For example, we can set the dialog to only show text files by filtering the results to only files with .txt file extensions. The Filter property requires a special pattern.
Description1|FilterPattern1|Description2|FilterPattern2|...DescriptionN|FilterPatternNWe first start with a description telling about the type of file. We then follow it with a vertical bar (|) followed by the filter pattern. For example, the following pattern only shows the text files.
Text Files|*.txtThe description here is Text Files and the pattern is *.txt. The * character is a wildcard character which means any names. The .txtportion specifies the specific file extension. The filter pattern says any file with a file extension of .txt. You can also use the wildcard characters for many another purpose. For example, m*.txt is the pattern for all the text files that start with letter m. *r.txt is the pattern for all the text files that ends with letter r, *.* is the pattern for all kinds of files, *.t* is the pattern for all files that have a file extension that starts with letter t.
You can specify multiple filters. For example, the following pattern adds multiple filters.
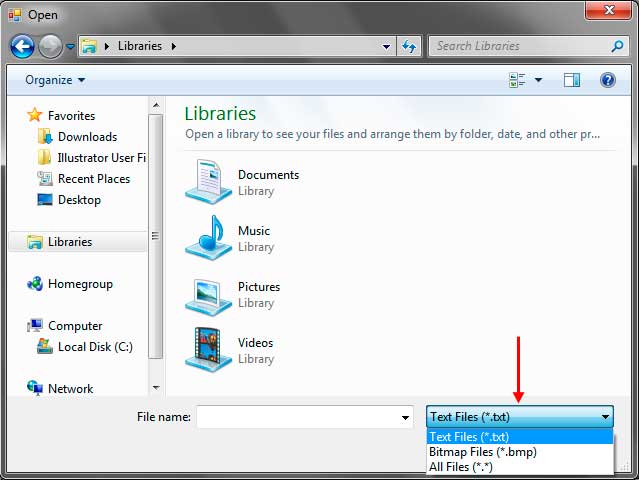
Text Files|*.txt|Bitmap Files|*.bmp|All Files|*.*You can select a filter using a combo box next to the file name text box of the dialog.

You can group a set of file extensions for a single description. For example, image files consist of different file extensions such as bmp, jpeg, or png. You simply separate the file extensions using semicolons.
Image Files|*.bmp;*.jpeg;*.png;*.gifWhen you select this filter, then all of the files that matches one of the filter patterns will be shown.
OpenFileDialog Control Example
We will now create an example application that uses the basic capabilities of the OpenFileDialog control. The application will allow a user to browse for a text file and view its contents using a multiline text box. Please note that we need to import the System.IOnamespace in our code.
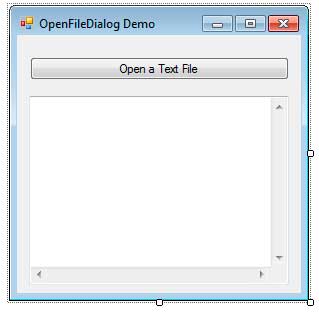
using System.IO;Create a form similar to the one below. Use a multiline text box by setting the Multiline property to true. Set the Scrollbars property of the text box to both and the WordWrap property to false (optional). Drag an OpenFileDialog control from the toolbox to the form.

Double-click the button to create an event handler for its Click event. Again, import the System.IO namespace first at the top of the code. Use the following code for the event handler.
private void button1_Click(object sender, EventArgs e)
{
    //Filter to only text files
    openFileDialog1.Filter = "Text Files|*.txt";
    //No initial file selected
    openFileDialog1.FileName = String.Empty;

    //Open file dialog and store the returned value
    DialogResult result = openFileDialog1.ShowDialog();

    //If Open Button was pressed
    if (result == DialogResult.OK)
    {
        //Create a stream which points to the file
        Stream fs = openFileDialog1.OpenFile();
        //Create a reader using the stream
        StreamReader reader = new StreamReader(fs);
        //Read Contents
        textBox1.Text = reader.ReadToEnd();
        //Close the reader and the stream
        reader.Close();
    }
}
The first line adds a filter using the Filter property. We specified in the pattern to only allow the user to open text files. The second one assigns an empty string to the FileName so there is no file selected by default. We then open the OpenFileDialog using its ShowMethodproperty which returns a DialogResult value. The user can now choose a text file by browsing the system. When the user presses the Open button while a valid file is selected, then the method ShowDialog will return DialogResult.OK. We tested this using an ifstatement. We used the OpenFile method of the OpenFileDialog control and store it in a Stream object. The Stream object points to the selected file and we use this object to create a StreamReader object which is used to read the stream(the file). We used the ReadToEnd method of the StreamReader object to read all the contents of the file and return the result as trying. We then place the result inside the text box.
Execute the application and click the button. Browse for a text file and click Open. If the file the user types cannot be found, then an error will show up if the CheckFileExists and CheckPathExists properties are set to true. If the file is valid and you press Open, then the contents of the file will be shown in the text box.