Anchoring Controls
One problem when placing controls in a windows form is that their location stays the same when the form is resized. This could result in a total mess of the forms layout. It will also look very unprofessional. Consider the example below. We created a simple form with several controls in it. When we run the program at first, you will see that nothing is wrong.
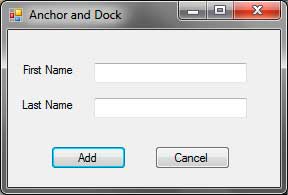
But when we resize the form by dragging the sides of the form or hitting the maximize button, you will definitely see the problem.
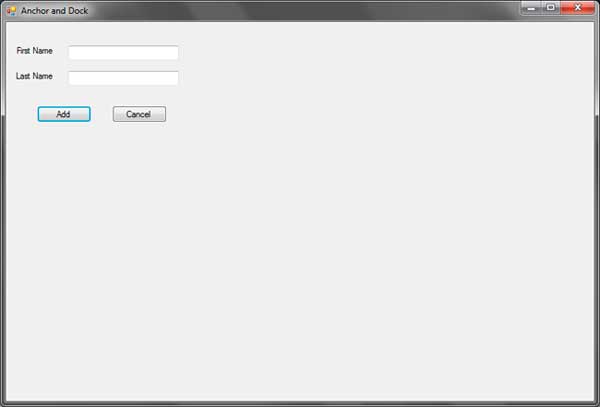
Note that the image above was resized to fit the page. As you can see, the position of the controls did not adjust accordingly when we resized the form.
One way to fix this is using the Anchor property which are available to most of the controls. The anchor property tells how the control behaves when we change the size of the form. We can specify if the control will anchor to the different edges of the form. We can also specify how the controls will resize.
Let’s try putting to anchor our controls so they will look natural whatever the size of the form is. The Anchor property accepts a value from the System.Windows.Forms.AnchorStyles enumeration
| AnchorStyle | Description |
|---|---|
| Bottom | The control is anchored to the bottom edge of the container. |
| Left | The control is anchored to the left edge of the container. |
| Right | The control is anchored to the right edge of the container. |
| Top | The control is anchored to the top edge of the container. |
| None | The control is not anchored to any of the edges of the container. |
System.Windows.Forms.AnchorStyles Values
The default anchor of every control is a combination of Top and Left. When we assign AnchorStyles values to the Anchor property of a control, the distance of the control from the particular edge remains the same even if we resize it. For example, let’s anchor a button to its right edge.
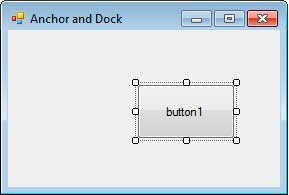
Visual Studio/Visual C# Express has a tool for specifying anchor styles. Select the control that will have an anchor. Go to the Properties Window and find the Anchor property.
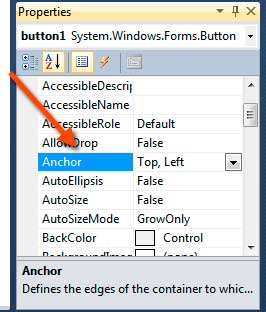
Click the drop down button and you will be presented with a small window with 4 rectangles on each edge.

The rectangle at the center represents the control. The gray rectangles are the edges where the control will be anchored. You simply click these rectangles to add or remove an AnchorStyle to the control. Let’s try remove the anchor to the Top and Left, and add an Anchorto the Right edge.

Now run the program and try to resize the form. Examine the distance of the button from the right edge when it was not resized and after it is resized.
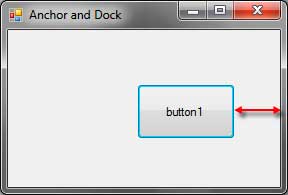
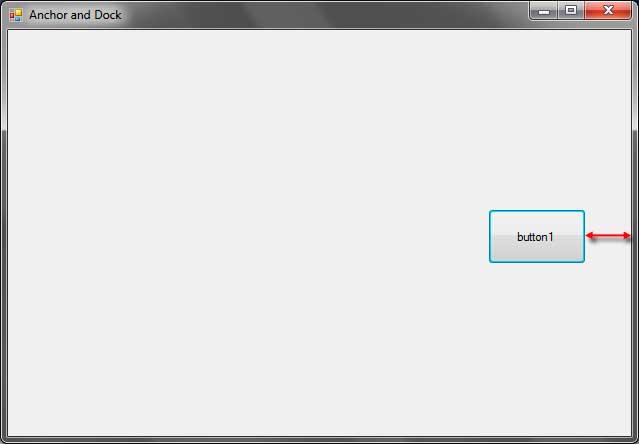
As you can see, the distance of the control from the right edge regardless of the form’s size is the same. Now let’s say we add an anchor style to the Bottom, then we will have a combination of Right and Bottom anchor styles.

With these combinations of AnchorStyles, the control will always have the same distance from the right edge of the form and from the bottom edge of the form.
Now what will happen if we specified anchor directions that are against each other? For example, the Left is against Right. We are expecting that the control will have the same distance from its left and right edge.

Run the program and resize the form.
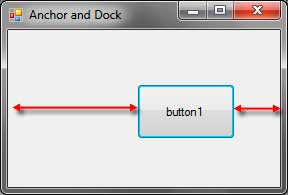
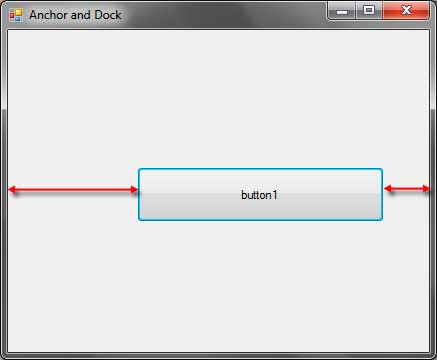
The button was resized to maintain the two distance from its opposite sides. If anchor the control to all the four sides, the control will be resized horizontally and vertically to keep its distance on all sides.
The control will have a different behavior when we remove all the anchors (setting the Anchor property to AnchorStyles.None). The control will move half of the amount of resizing done to one side of the form. For example, if we resize the form to the right by 100px, then the control will move to the right by 50px (half of 100). If we resize the form 100px to the right and 50px to the bottom, then the control will move 50px to the right and 25px to the bottom.