Breakpoints
Breakpoints allow your program to stop at certain points of the execution. You put breakpoints at a location of the code that you want to investigate. Breakpoints will solely be attack feasible lines of code. Once the program is suspended victimization breakpoints, you then use alternative tools of the Visual Studio to seek out errors within the code.
We will use the program below to demonstrate the use of breakpoints. Create a new Console Application and name it Breakpoints. Then replace the generated code with the code below.
using System;

namespace Breakpoints
{
    public class Program
    {
        public static void Main()
        {
            Console.WriteLine("Line 1");
            Console.WriteLine("Line 2");
            Console.WriteLine("Line 3");
            Console.WriteLine("Line 4");
            Console.WriteLine("Line 5");
            Console.WriteLine("Line 6");
            Console.WriteLine("Line 7");
            Console.WriteLine("Line 8");
            Console.WriteLine("Line 9");
            Console.WriteLine("Line 10");
        }
    }
}
Example 1 – Code for Breakpoint Demonstration
Adding Breakpoints
To add breakpoints, find a line of executable code and click at the gray margin right beside that line of code. As an example, let’s add a break at the second WriteLine statement.
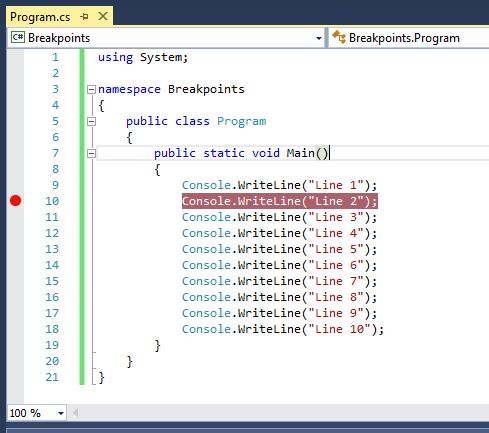
Alternatively, you can right-click the statement and then choose Breakpoints > Insert Breakpoint. The line of code or statement that has a breakpoint will be covered in red. To remove a breakpoint, simply click the breakpoint or right click the line of code with the breakpoint and choose Breakponts > Delete Breakpoint. You can use the F9 shortcut key while in the desired line of code to toggle a breakpoint on or off.
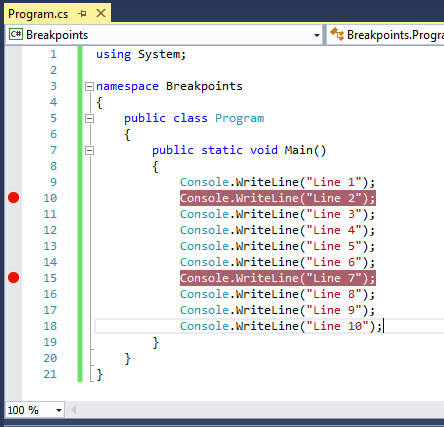
You can add as many breakpoints as you want at different locations of your code. Add another at the seventh WriteLine statement.
To see the breakpoints in action, run the program in Debug mode by pressing F5 in the keyboard. Please note that you can stop debugging by pressing the ![]() button next to the Debug button in the Debug toolbar. The program will execute and suspend execution when it encounters the first break point.
button next to the Debug button in the Debug toolbar. The program will execute and suspend execution when it encounters the first break point.
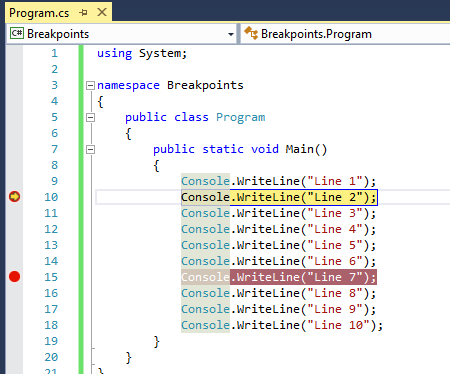
The execution suspends the at the second WriteLine statement, executing the code that precedes it. If you will look at the console window, the first WriteLine statement has already executed. The yellow arrow indicates the current line that is being executed by the program. The corresponding line also has a yellow highlight to indicate that it is the one currently being executed. To continue to the next breakpoint, you can use the ![]() . You can also press F5. Another way is by going to Debug > Continue.
. You can also press F5. Another way is by going to Debug > Continue.
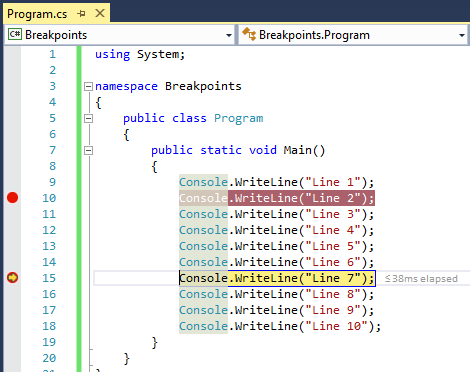
Continuing to the next break point executes all the code between the source breakpoint and the destination breakpoint. If you will look again at the console, all the lines preceding the current breakpoint has been executed. You can see that the yellow arrow which indicates the currently executing line is now transferred to the next breakpoint. If there are no more breakpoints following the current breakpoint, then the program will exit.
You can also disable breakpoints so they will not activate temporarily. To do that, right-click the breakpoint and choose Disable Break Point, or you can right click the statement and choose Breakpoints > Disable Breakpoint. A disabled breakpoint will look like a hollow circle. To enable it, right-click the disabled breakpoint, and choose Enable Breakpoint. You can use the shortcut Ctrl+F9 while your cursor is on the statement with the breakpoint to enable or disable a breakpoint.