Writing to an XML File
Using the classes and methods of the XML Document Object Model, we can easily construct an XML document and save it to a file. We will create an application to demonstrate how we can write an XML file by using the DOM classes. The application that we will create allows a user to specify his or her name, age, and gender. The details will then be added to an XML file. Create a new Windows Forms Application and create a form similar to Figure 1.
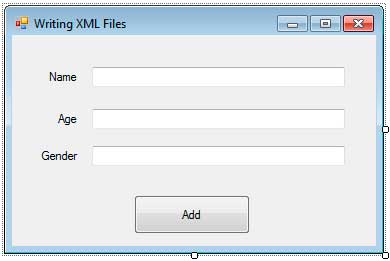
Figure 1
Change the name of the text boxes to textBoxName, textBoxAge, and textBoxGender. Change the name of the button to buttonAdd.
We will now add the codes required to construct the XML document and write it to a file. Go to the Code View by hitting F7. Be sure to import System.Xml first at the top section of the code.
using System.Xml;We need to add a private XmlDocument member and a string indicating the path of the XML file that we will use throughout the code. Write these right below the class declaration.
private XmlDocument doc;
private const string PATH = @"C:sample.xml";
Go back to the designer and double click the add button to generate an event handler for its Click event then use the following code.
private void buttonAdd_Click(object sender, EventArgs e)
{
    //Create an xml document
    doc = new XmlDocument();

    //If there is no current file, then create a new one
    if (!System.IO.File.Exists(PATH))
    {
        //Create neccessary nodes
        XmlDeclaration declaration = doc.CreateXmlDeclaration("1.0", "UTF-8", "yes");
        XmlComment comment = doc.CreateComment("This is an XML Generated File");
        XmlElement root = doc.CreateElement("Persons");
        XmlElement person = doc.CreateElement("Person");
        XmlAttribute name = doc.CreateAttribute("name");
        XmlElement age = doc.CreateElement("Age");
        XmlElement gender = doc.CreateElement("Gender");

        //Add the values for each nodes
        name.Value = textBoxName.Text;
        age.InnerText = textBoxAge.Text;
        gender.InnerText = textBoxGender.Text;

        //Construct the document
        doc.AppendChild(declaration);
        doc.AppendChild(comment);
        doc.AppendChild(root);
        root.AppendChild(person);
        person.Attributes.Append(name);
        person.AppendChild(age);
        person.AppendChild(gender);

        doc.Save(PATH);
    }
    else //If there is already a file
    {
        //Load the XML File
        doc.Load(PATH);

        //Get the root element
        XmlElement root = doc.DocumentElement;

        XmlElement person = doc.CreateElement("Person");
        XmlAttribute name = doc.CreateAttribute("name");
        XmlElement age = doc.CreateElement("Age");
        XmlElement gender = doc.CreateElement("Gender");

        //Add the values for each nodes
        name.Value = textBoxName.Text;
        age.InnerText = textBoxAge.Text;
        gender.InnerText = textBoxGender.Text;

        //Construct the Person element
        person.Attributes.Append(name);
        person.AppendChild(age);
        person.AppendChild(gender);

        //Add the New person element to the end of the root element
        root.AppendChild(person);

        //Save the document
        doc.Save(PATH);
    }

    //Show confirmation message
    MessageBox.Show("Details have been added to the XML File.");

    //Reset text fields for new input
    textBoxName.Text = String.Empty;
    textBoxAge.Text = String.Empty;
    textBoxGender.Text = String.Empty;
}
Figure 1
When the Add button is clicked, a new XmlDocument is created. This will represent the XML document that will be written to the file specified by the PATH private field. We now test if the file was already created using the Exists method of the System.IO.File class. If it does not exist, then create a new file and add the first record. If the file already exists, then we load the file and append the new record.
Let’s discuss the codes when the file is first created.
//Create neccessary nodes
XmlDeclaration declaration = doc.CreateXmlDeclaration("1.0", "UTF-8", "yes");
XmlComment comment = doc.CreateComment("This is an XML Generated File");
XmlElement root = doc.CreateElement("Persons");
XmlElement person = doc.CreateElement("Person");
XmlAttribute name = doc.CreateAttribute("name");
XmlElement age = doc.CreateElement("Age");
XmlElement gender = doc.CreateElement("Gender");
The above code creates the necessary nodes that will be added to our XML document. We first created a XML Declaration using the XmlDeclaration class and the XmlDocument‘s CreateXmlDeclaration method. This method accepts three parameters; the version, encoding, and if the file is standalone.
We then create a comment using the XmlComment class and the CreateComment method and pass the text that the comment will use to the method. I add this to demonstrate how to create and add comments.
We then created the root element using the CreateElement method and the XmlElement class. We use the CreateElement class to create the root element, parent, and child elements. The method accepts one string argument which will be the name of the element.
Next, we create the Person element which will hold the data typed by the user. The Person element has one attribute which is the name and an Age and Gender child elements. The CreateAttribute method accepts one string argument which is the name of the attribute. The attribute details are stored in an XmlAttribute object. Since the Person, Age, and Gender are elements, we used the CreateElement method and the XmlElement class for them.
name.Value = textBoxName.Text;
age.InnerText = textBoxAge.Text;
gender.InnerText = textBoxGender.Text;
We now add the values for some nodes that needed them. The values are taken from the text boxes with the user’s input in it. The XmlAttribute object uses the Value property to access and set its value. The XmlElement uses InnerText (or InnerXml) to add values inside it.
doc.AppendChild(declaration);
doc.AppendChild(comment);
doc.AppendChild(root);
root.AppendChild(person);
person.Attributes.Append(name);
person.AppendChild(age);
person.AppendChild(gender);
We will now assemble the pieces together to form the full XML document. First, we append the declaration to the XmlDocument using the AppendChild method which accepts an XmlNode and adds it as the last child of the document. We then append the comment which places it right below the declaration. Next, we append the root element which places itself below the comment. Please note that the order of appending nodes is important. Once the root element is appended, we now add the necessary nodes inside the root element. We add the first person element to the root element. Then we add the name attribute using the Append method of its Attributes property. Finally, we add the age and gender elements to the person element. Please note that it is not important which element you construct first. For example, we can construct and complete the person element first before adding it to the root element. Then we can add the declaration, comment and root element in the proper order.
doc.Save(PATH);This method saves the constructed XML document to the specified file path.
Let’s now discuss the codes inside the else block which executes if the XML file is already created. This part will load the XML file, get the root element, and attach the new person to the list of persons the root element already has.
//Load the XML File
doc.Load(PATH);

//Get the root element
XmlElement root = doc.DocumentElement;
Once the file using the specified path is loaded using the Load method, the root element of that file is retrieved using the DocumentElement property. Now that we have the access to the root element, we can now add more person elements. We constructed the new person element using the details typed by the user. Then, we add the new person to the end of the list of child elements of the root element. We then update the XML file by calling the Save method again. The final lines of code simply show a success message and then clears the text fields so it can accept new inputs.
Execute the application and type at least two person details. The XML file will be located to the path specified by the PATH variable. You can change this path to a different location. You will see the created XML file and the generated contents.
<?xml version="1.0" encoding="UTF-8" standalone="yes"?>
<!--This is an XML Generated File-->
<Persons>
  <Person name="John Smith">
    <Age>30</Age>
    <Gender>Male</Gender>
  </Person>
  <Person name="Lisa Carter">
    <Age>22</Age>
    <Gender>Female</Gender>
  </Person>
</Persons>
You have now successfully generated an XML file using the XML DOM classes and methods. You can play with more of its method and experiment their functionality.