Adding Menus to Your Form
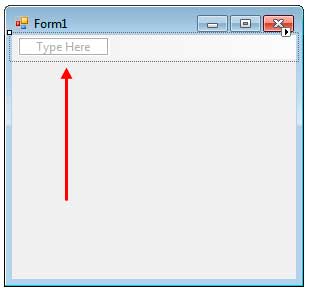
Menu bars can be seen in almost every application out there. Menus are used to contain different commands that the user can use. You can add menu bars to a form by using the MenuStrip control (System.Windows.Forms.MenuStrip). The MenuStrip is the container of the different menus. To add a menu bar to your form, drag a MenuStrip control from the Toolbox. It is located in the Menus & Toolbars Section.
You can also see the MenuStrip control in a section located at the bottom of the Designer. Located here are some non-visual components such as a Timer control and many more.
The MenuStrip control has the following useful properties.
| Property | Description |
|---|---|
| Dock | Determines which location to dock the menu bar. The default is Top. |
| GripStyle | Allows you to show the grip which is used to repositions items in the menu strip. |
| Items | A collection of top-level menus. |
| Stretch | Specifies whether the MenuStrip stretches from end to end in its container. |
Figure 1 – MenuStrip Properties
Adding Standard Menus
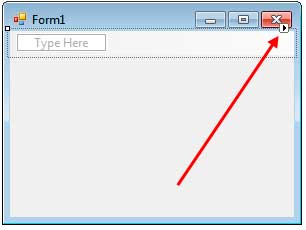
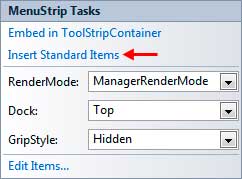
Visual Studio offers you a way to automatically add standard items to the MenuStrip control. To do this, open the smart tag, which can be done by pressing the arrow button at the upper right side of the MenuStrip.
Then choose Insert Standard Items.
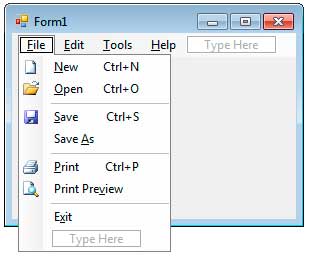
Visual Studio will fill the MenuStrip with standard menus such as Creating New files, Saving Files, Loading and many more.
Adding Your Own Menus
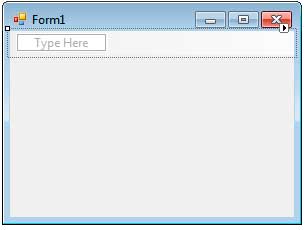
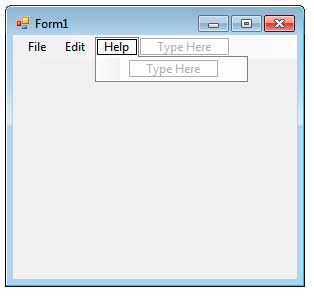
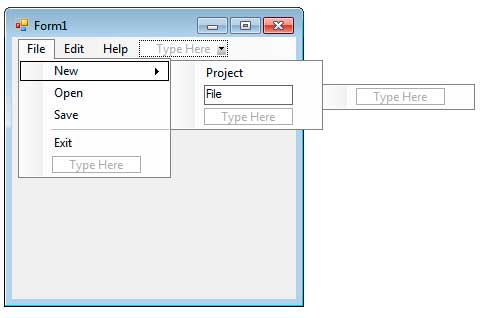
The standard menus might not suit what you specifically need. We can create our own custom menu bar using Visual Studio’s tools. You can either undo the placement of the standard menu by hitting Ctrl+Z or you can simply delete the MenuStrip and add a new one. To add a menu item, click the box labeled “Type Here” and type the name of the menu.
You will notice that as you type, another box will appear beside and below it so you can add more items. As an example, type File, Edit, and Help in the MenuStrip.
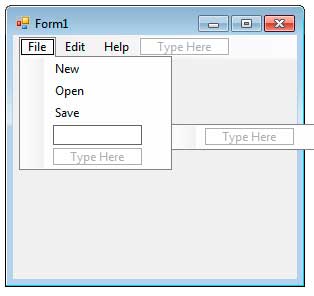
To add submenus, click a menu item it will open up a container for all its submenus. You will also see a box that will allow you to insert sub menus.
If you want to add a separator, type the – character.
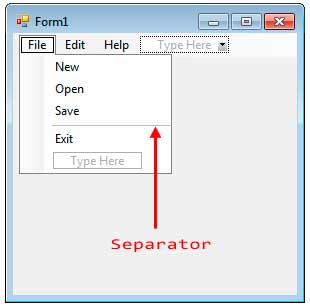
You can even create submenus of submenus. You can nest and nest menus if you want to. A submenu which contains another submenu can be identified by the arrow at its right side.
Each text menu item you add is represented by ToolStripMenuItem. The separator is represented by ToolStripSeparator. The ToolStripSeparator is only used to separate related menus. Each ToolStripMenuItem is added to the MenuStrip‘s Item property and each submenu is added to the ToolStripMenuItem‘s DropDownItems property. Visual Studio automatically adds a name to each ToolStripMenuItem control which is based on the text you specified. Let’s discuss the properties of the ToolStripMenuItem.
| Property | Description |
|---|---|
| Checked | Tells whether the item is checked. |
| CheckOnClick | Tells whether an item will be checked or unchecked when it is clicked. |
| CheckState | Tells whether the item is checked or unchecked. |
| DropDownItems | A collection of submenus of the current item. |
| Enabled | Enables of disables this item. |
| Image | An optional image or icon that is shown at the left of the label. |
| ShortcutKeys | The shortcut keys associated with the ToolStripMenuItem. |
| ShowShortcutKeys | Tells whether the shortcut keys for an item is shown in the menu. |
| Text | The text or label of the menu item. |
| ToolTipText | The text inside the tooltip that appears when you hover your mouse on the menu item. |
Figure 2 – ToolStripMenuItem Properties
Checking and Unchecking Menu Items
The CheckOnClick property allows a menu item to be checked or unchecked. For example, you can have a menu that shows a list of windows that will be shown. You can turn their CheckOnClick properties to true. When a menu item is checked, you will see a check in its left side.
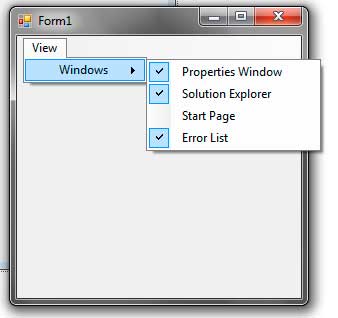
You can use the Checked or CheckState property of the menu item to tell whether it is checked or unchecked.
Adding Shortcut Keys to a Menu Item
You can add shortcut keys to a menu item. The easiest one is by using the & (ampersand) character when typing the name of the menu item.
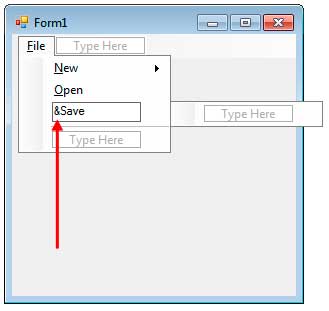
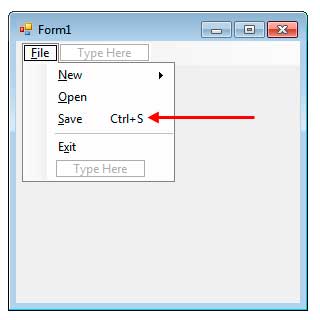
The letter following the & character will be considered as the shortcut key. For example, &Save will have S as the shortcut key and E&xitwill have the X as the shortcut key. At the designer, the shortcut key will be underlined. The underline will not be shown during runtime unless you hit the Alt key. Using this type of shortcut key requires the use of the Alt key. To activate a menu item, you hit the Alt + Shortcut Key. For example, if the shortcut Key of the File menu is F, then you use Alt + F combination to activate the menu item.
If you want more complex shortcut combinations, then we have to use the ShortcutKeys property. Select a menu item and then go to the Properties Window and find the ShortcutKeys property. Click the drop down arrow to show you a small window that allows you to choose the shortcut keys for the current menu item.
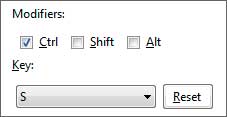
Once you specified a shortcut combination, it will now appear beside the label of a menu item provided that the ShowShortcutKeysproperty of the menu item is set to True.
Adding Icons to Menu Items
You can add images or icons at the left side of a menu item as seen in the standard menus.
We use the Image property to do just that. Click the drop down button of the Image property in the Property Window. Choose which resource to use and then browse for the appropriate image. If the image is too large, then it will automatically be scaled based on the value of the ImageScaling property.
Adding Functionality to the Menu Items
Menu items have the Click event which occurs when the menu item is clicked. We can handle this event to give functionality to menu items. To add a Click event to a menu item, in the Designer, double-click the menu item and Visual Studio will automatically create an event handler for you. For menu items that have CheckOnClick properties set to true, you can handle the CheckedChange or CheckStateChange events. As an example create another form and create a menu as seen below.
Double click the Exit menu item. Visual Studio will create an event handler for its Click event. Add the following code.
private void exitToolStripMenuItem_Click(object sender, EventArgs e)
{
    Application.Exit();
}
The static method Exit of the Application class simply closes the application.