Creating Toolbars
A toolbar contains buttons and other components that serve as menu commands to the user. Like the menu, toolbars are also seen in numerous famous applications such as the Microsoft Office 2003 products. Below shows the toolbar seen in the Microsoft Word 2003 interface.

Figure 1
ToolStrip Control
We used a ToolStrip control (System.Windows.Forms.ToolStrip) to contain the buttons or components of a toolbar. You can move a ToolStrip using the move handles represented by vertical dots to it’s left side provided that they are contained inside the ToolStripContainer control as we will see later. Below shows the important properties of the ToolStrip control.
| Property | Description |
|---|---|
| CanOverflow | Specifies whether the items that can’t fit inside the ToolStrip will be placed in a separate hidden area accessible via a drop-down button. |
| GripStyle | Indicates whether the ToolStrip move handle is unmistakable or covered up. |
| Items | Contains the things that have a place with the ToolStrip. |
| LayoutStyle | Specifies how the items will be displayed. |
| ShowItemToolTips | Specifies whether each item will show a tooltip. |
| Stretch | Specifies the Orientation of the ToolStripPanel. |
Figure 2 – ToolStrip Properties
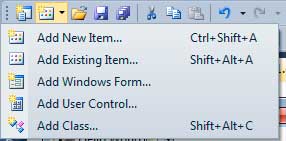
Adding Standard Items to Toolbar
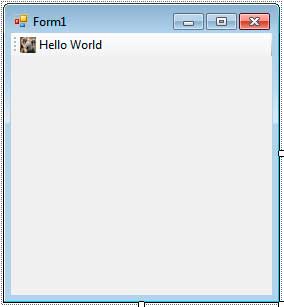
Before we create our own customized toolbar, let’s see how VS/VCE can automatically create standard items for use such as the Save, Open, Copy, and Paste buttons. Create a new Windows Forms Application and name it ToolBarDemo. From the Menus & Toolbars section of the Toolbar, drag a ToolStrip control to the form. You form should now look like this.
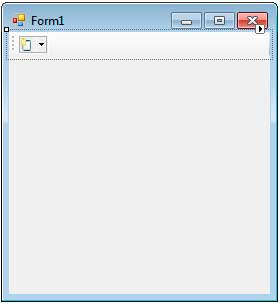
Click the small square with an arrow located to the top right side of the ToolStrip to reveal a small window.
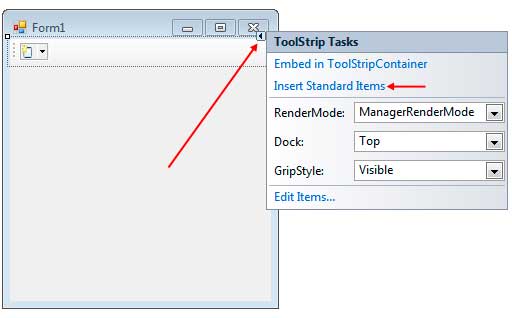
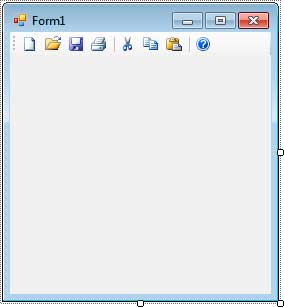
Click the “Insert Standard Items” and VS/VCE will create standard buttons as seen below.
ToolStrip Items
The Items property will hold the items that are contained by the ToolStrip. There are multiple kinds of items that can be placed inside a ToolStrip and they all inherit from the ToolStripItem class.
| ToolStripItem | Description |
|---|---|
| ToolStripButton | An item that represents a button. You can click this item to perform different actions. |
| ToolStripLabel | An item that represents a label used to show uneditable texts. It can also display an image instead of text. |
| ToolStripSplitButton | An item that represents a button with a drop down arrow beside it. Clicking the drop down arrow shows a drop down menu that you can click. The button itself has its own functionality when clicked. |
| ToolStripDropDownButton | Similar to the ToolStripSplitButton, this one also shows a button with a drop down arrow, but the button is now represented with an image that when clicked, opens up the drop down menu. |
| ToolStripComboBox | An item that represents a combo box that shows a drop-down list of items that you can choose. |
| ToolStripProgressBar | Adds a progress bar to your toolbar. |
| ToolStripSeparator | Adds a horizontal or vertical divider between ToolStrip items. |
| ToolStripTextBox | A item that represents a text box. You can type a text in this item that will be used for processing. |
Figure 3 – ToolStrip Items
The following section shows you how to create and use each of these ToolStrip items.
The ToolStripButton
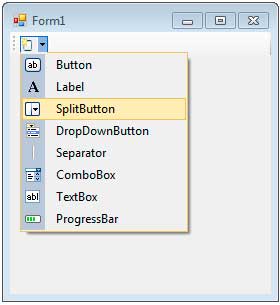
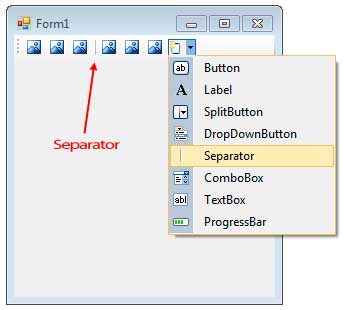
The ToolStripButton control is the most basic component you see in a toolbar. You click a ToolStripButton control and it will execute its Click event just like an ordinary button. Delete the previous ToolStrip with standard menus and add a new ToolStrip control. If you select the ToolStrip, you will see an icon with a drop-down button beside it. Clicking it will show you a list of ToolStrip items you can add.
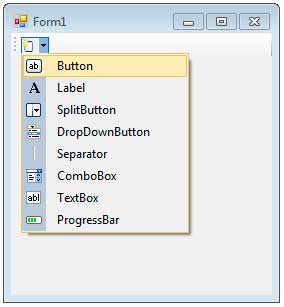
Choose the Button to add a ToolStripButton control to the ToolStrip.
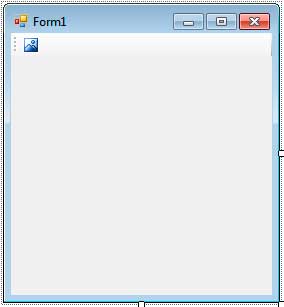
The button uses a default icon. If you want to change it, then you can use the Image property of the ToolStripButton in the Properties Window and then browse for the desired image. In the Designer, double-click the created ToolStripButton to generate an event handler for its Click event. Add the following code inside the event handler.
MessageBox.Show("Button was clicked!");The code above simply shows a message when you click the button in the ToolStrip. In a more realistic scenario, you will add codes that perform specific tasks such as changing the font style of a font in a text box.
The ToolStripLabel
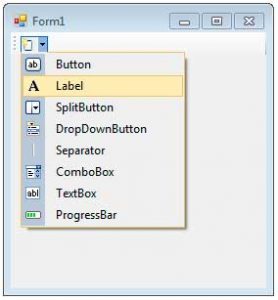
The ToolStripLabel control allows you to add an uneditable text that can be used to describe other items. It also allows you to add an optional image beside the label. To add a ToolStripLabel, you click the new item icon in the ToolStrip and choose Label from the list.
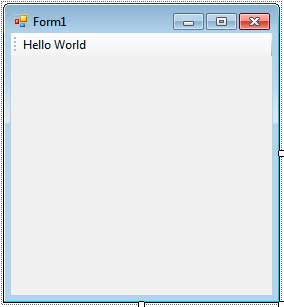
When a new ToolStripLabel has been added, you can then use the Text property to change the text of the label.
You can also add an image by using the Image property. You can go to the Properties Window and click the button beside the Imageproperty. You can then browse an image to be displayed beside the label.
The ToolStripSplitButton
The ToolStripSplitButton control represents a button that can be clicked. Additionally, it has a drop-down button beside it that when clicked, shows a drop-down menu related to the functionality of the button. One example of this control is the Add New Item button in the Toolbar of Visual Studio.
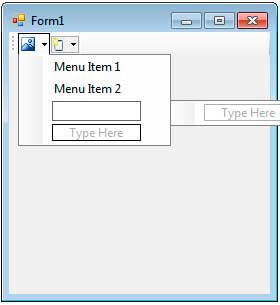
When you click the actual button, it shows the Add New Item Window instead of showing the list of menus. To add a ToolStripSplitButton control, click the new item icon in the ToolStrip and choose SplitButton.
When the ToolStripSplitButton is added, you can click its dropdown button to add menu items by typing each one in.
The button and the menu items can react to their own Click events. Note that the button and each menu items’ Click event handler are separate from each other. Like the ToolStripButton control, you can also change the icon of the ToolStripSplitButton control using the Image property.
The ToolStripDropDownButton
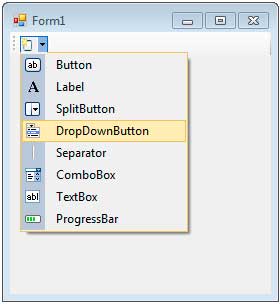
The ToolStripDropDownButton is similar to the ToolStripSplitButton in that it also shows a drop-down menu when clicked. The only difference is that the actual button is simply an image that when clicked, shows the menu as if you clicked the drop-down button. Therefore, the button’s purpose is just to open the hidden drop-down menu. Like the other ToolStripItems, you can create a ToolStripDropDownButton by clicking the new item icon in the ToolStrip and by choosing the DropDownButton.
Adding menu items is similar to the ToolStripSplitButton control. You simply type in the menu items that you want to add to the drop-down menu. Like the ToolStripButton control, you can also change the icon of the ToolStripDropDownButton control using the Image property.
The ToolStripComboBox
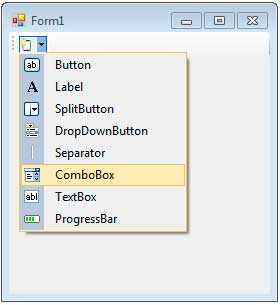
The ToolStripComboBox allows you to embed a combo box to your ToolStrip. It’s just like an ordinary ComboBox control. You add items using the Items property and you react to SelectedIndexChanged event.
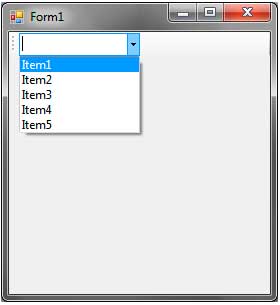
The following shows a ToolStripComboBox with some items added to it.
Note that the default event of the ToolStripComboBox is the Click event so you need to go to the Events section of the Properties Window and find the SelectedIndexChanged event if you want to add an event handler to it.
The ToolStripTextBox
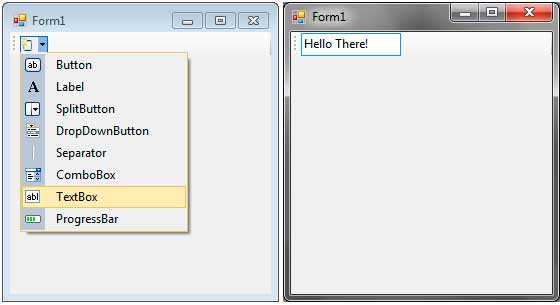
The ToolStripTextBox allows you to add a text box in the ToolStrip. The ToolStripTextBox is similar to an ordinary TextBoxcontrol and the most imporant property is the Text and it reacts to the TextChanged event.
Note that the default event of the ToolStripTextBox is the Click event so you need to go to the Events section of the Properties Window and find the TextChanged event if you want to add an event handler to it.
The ToolStripSeparator
The ToolStripSeparator control has only one purpose, to separate related ToolStrip items.
As you can see above, the ToolStripSeparator divides the ToolStrip into groups.
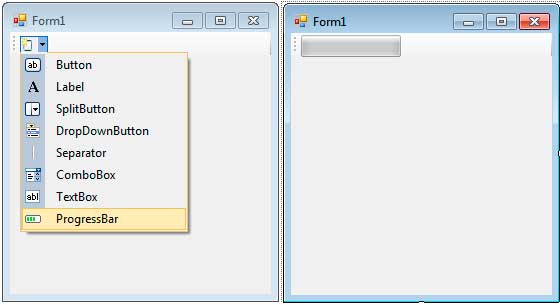
The ToolStripProgressBar
The ToolStripProgressBar is used to show the progress of a certain process such as saving, copying, deleting, or any task that may require the user to wait. It gives the user a hint on the progress of a certain process. Without it, the user may think that the program is stuck or is not responding properly.
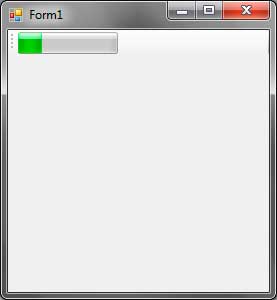
The most important property for the ToolStripProgressBar is the Value and Step property. The Value property specifies the current progress of the progress bar. The Step property specifies how much to increment the Value when calling the PerformStep() method. As a simple example, change the Step property to 1 and add a Timer control from the Components section of the Toolbar to the form. Change the Enabled property of the Timer to True and double click it to generate an event handler for its Tick event. Add the following code inside the event handler.
toolStripProgressBar1.PerformStep();This performs the PerformStep() method for every 100 milliseconds (as specified by the Interval of the Timer) and increases the value of the ToolStripProgressBar by 1 (as we specified in the Step property). Run the program and watch as the progress bar gradually fills.
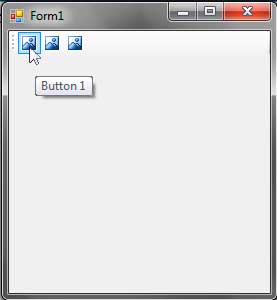
Adding ToolTips to ToolStrip Items
Each item has a ToolTipText property that specifies the tool tip to show when you hover you mouse to an item. Please note that the ShowItemToolTips property of the ToolStrip must be set to True for the tool tips to show.
Using the CanOverflow and Overflow Properties
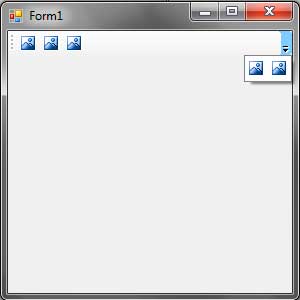
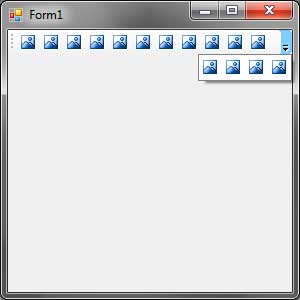
So what will happen if the toolbar has too many items that it won’t fit the space provided for the ToolStrip? By default, the CanOverflow property of the ToolStrip is set to True. This all the items that are out of the width or height of the ToolStrip. You can then access them using a drop-down button as seen below.
You can also set the Overflow property of a ToolStripItem to Always. This puts an item to the hidden menu even if the ToolStrip still has lots of space.