Inserting Records: Connected Approach
Inserting records is very easy to do using the ADO.NET’s Command classes. We will discuss inserting of records using the connected approach. We will also take a look at using parameters. The following are the basic steps of inserting the record.
- Create a Connection
- Create a Command
- Specify connection string to Connection
- Specify Connection that the Command will use
- Specify the INSERT Statement for the CommandText of the Command
- Add values to command parameters if any
- Open Connection
- Execute the command
- Close Connection
You can see that the steps are fewer compared to querying a data from a database. The following application uses the University database and allows you to insert new records to the Students table. Create a new Windows Forms Application and name it InsertingRecordsConnected. Add labels and text boxes for FirstName, LastName, Gender, Age, and Address fields. Name the text boxes firstNameTextBox, lastNameTextBox, genderTextBox, ageTextBox, and address textbox. Also, add a button and name it addButton.

Figure 1
Double-click the button to produce an event handler for its Click event. Import the System.Data.SqlClient and use the following code for the handler.
private void button1_Click(object sender, EventArgs e)
{
    SqlConnection connection = new SqlConnection();
    SqlCommand command = new SqlCommand();

    connection.ConnectionString = @"Data Source=.SQLEXPRESS;" +
        "Initial Catalog=University;Integrated Security=SSPI";
    command.Connection = connection;
    command.CommandText = "INSERT INTO Students " +
        "(FirstName, LastName, Gender, Age, Address) VALUES " +
        "(@FirstName, @LastName, @Gender, @Age, @Address)";

    command.Parameters.AddWithValue("@FirstName", firstNameTextBox.Text);
    command.Parameters.AddWithValue("@LastName", lastNameTextBox.Text);
    command.Parameters.AddWithValue("@Gender", genderTextBox.Text);
    command.Parameters.AddWithValue("@Age", ageTextBox.Text);
    command.Parameters.AddWithValue("@Address", addressTextBox.Text);

    try
    {
        connection.Open();
        int result = command.ExecuteNonQuery();
        if (result > 0)
            MessageBox.Show("Student successfully added!");
        else
            MessageBox.Show("Failed to add student!");
    }
    catch (SqlException ex)
    {
        MessageBox.Show("An error has occured!");
    }
    finally
    {
        connection.Close();
    }
}
Example 1
We only declared a Connection and a Command because they are sufficient to do our task for inserting records. We also assign an INSERT statement as the CommandText for our command (lines 9-11). As you can see, the command has several command parameters which start with the @ symbol. Also, notice that we didn’t specify the StudentID in the list of parameters because it is an identity field and will automatically be assigned a value. Lines 13-17 adds values to each parameter using the AddWithValue() method of the DbCommand‘s Parameters property. This method accepts the command parameter name, and the actual value that will replace it. For example, we are going to change the @FirstName parameter with whatever the text of firstNameTextBox. Inside a try block, we open the connection and execute the command using the DbCommand.ExecuteNonQuery() method (line 22). This method is used to execute non-query SQL statements such as INSERT, DELETE, UPDATE, and CREATE which are statements that don’t return result sets. The method returns an integer value which represents the number of rows affected. Since we insert a record, we are expecting the value 1 to be returned. We placed the returned value in a variable. Using an if statement in line 23, we tested if the rows affected is not 0 to confirm that the row was successfully updated.
The catch block catches all the SqlException that will be thrown inside the try block. We simply write a code that will show an error message when a database-related error occurred such as wrong connection string. The final block contains the code to close the connection.
execute our program and add text values that will be inserted to the Students table.
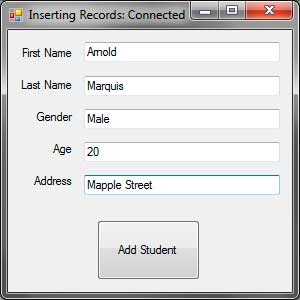
Figure 2
Click the add button to insert the record. If nothing is wrong, then a success message will show up.
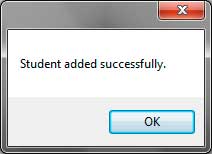
Figure 3
The next lesson will take a look at adding records using the disconnected approach.