Creating a Simple Windows Forms
You will now experience visual programming which is the “Visual” in Visual C#. Please note that this lesson guides you to the creation of a simple windows application which uses basic event-handling. I will show the steps for doing these and briefly discuss them. The concepts of forms, controls, event-handling, and certain parts Visual Studio used for designing will be discussed in their respective lessons.
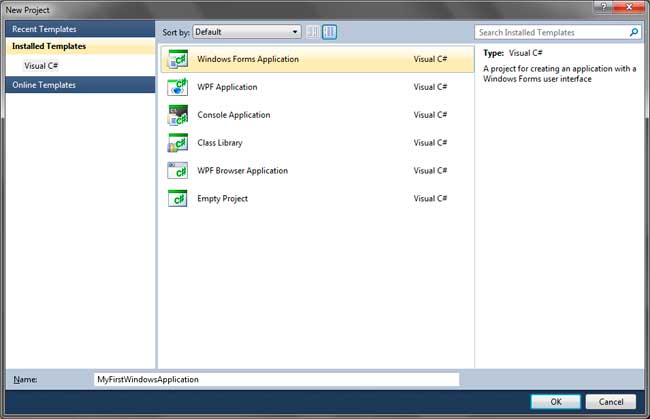
Open Visual C# Express and go to File > New Project. Then from the list of templates, choose Windows Forms Application. A Windows Forms Application is a type of application that has a graphical user interface. Name the project MyFirstWindowsApplication.
You will be presented with a blank form. The selected tab tells that you are viewing the Form1.cs file in Designer View.
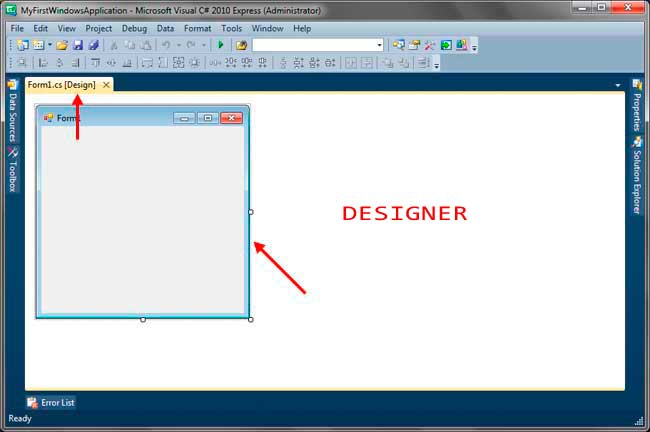
Two code files will be created that represent the form. But for now, we will concentrate on the file that is used to add functionality to the form. The form can be viewed in two modes, the Design View and Code View. The Designer will be shown if you are in design view. You will see here the actual form and any visual and non-visual controls you will add soon.
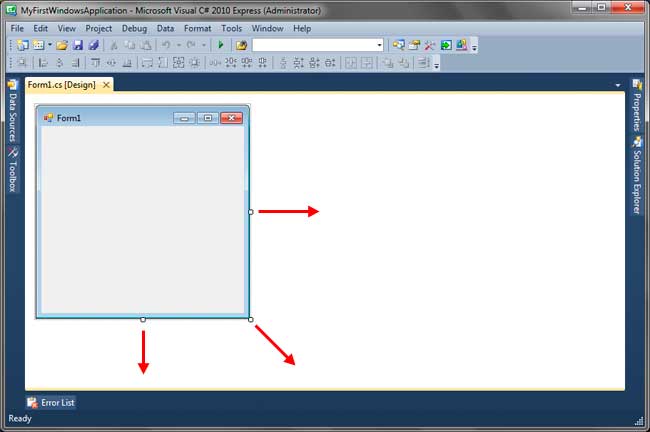
You can also resize the forms by dragging the resizing handles of the form while in the Design View.
Adding Controls to the Form
All the controls are located in the Toolbox. The Toolbox can be accessed via the Toolbox tab located by default at the left of the IDE. If it is not shown, you can go to View > Other Windows > Toolbox. Hover your mouse over or click the Toolbox tab to show the actual Toolbox.

The Toolbox is divided into categories and the most commonly used controls are located in the Common Controls category. To open a category and expose its control, simply click the category. The Toolbox will auto-hide by default. If you don’t want that behavior, then you can click the pin icon beside the close button of the Toolbox.
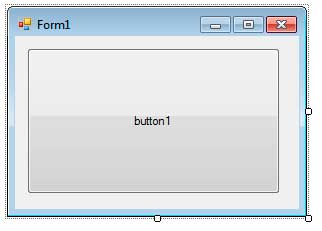
To add controls to the form, choose a control in the Toolbox and double click it. Alternatively, you can drag the control from the Toolbox to the form. Please note that you can only add controls to the client area of the form. The client area is the blank area of the form. You can delete a control or controls by selecting it in the designer and hitting Delete in your keyboard. Add a button control to the form. Most controls also has resizing handles just like the form itself. Resize and position the button as shown if Figure 5.
Changing the Properties of Controls
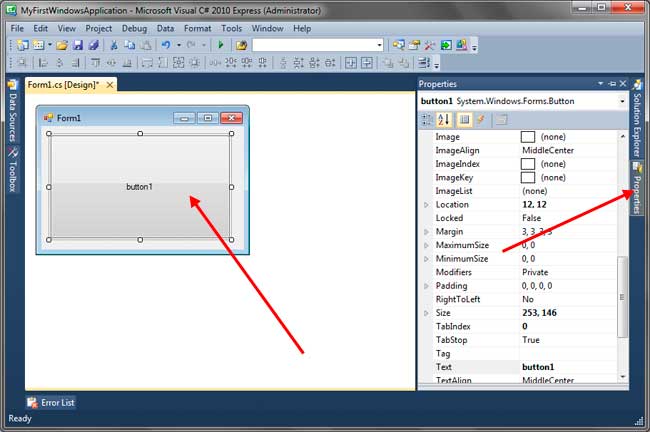
You can change certain properties of the form and controls. We use the Properties Window to view and change the value of all the available properties of a selected control in the Design View. Note that some properties are not shown in the Properties Window and can only be accessed in code.
Selecting a control is equivalent to single clicking a control in the Designer. For a demonstration of modifying control properties, select the button in the form, then go to the Properties Window. You can pin the Properties Window if you will be working with it frequently.
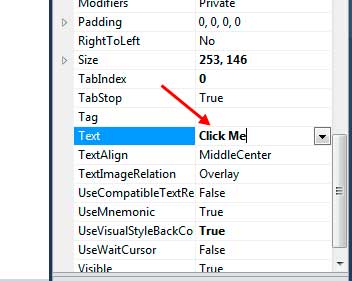
Find the Text property and change its value to “Click Me”.
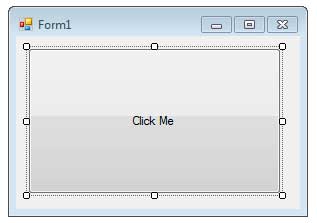
The text inside the button in the Designer will update.
You can also click the form in the Designer and change the Text property. When selecting the form, you need to click on any area of the form but not on the controls it contain.
Adding Event Handlers to Controls
The final part of this tutorial is showing you how to add event handlers to certain events of the controls. Events trigger when certain happenings occur. We put event handlers to an event. Event handling will be discussed in detail in a separate tutorial. Each control has its own default event. For example, the Button control has Click as its default event while the Form control has a default event of Load. Event handlers are methods that is associated with an event, and they execute when the associated event happens.
The easiest way to add an event handler is to double click a control in the Designer. You can only do this if you want to add event handlers to the default event of a control. To demonstrate this, double click the button in the Designer. Visual Studio will automatically create an event handler and attached that event handler to the default event of the double clicked control. Once the event handler is created, you will be taken to the Code Editor, with the cursor positioned inside the generated event handler. All you need to do is type the codes that will run when the event occurs.
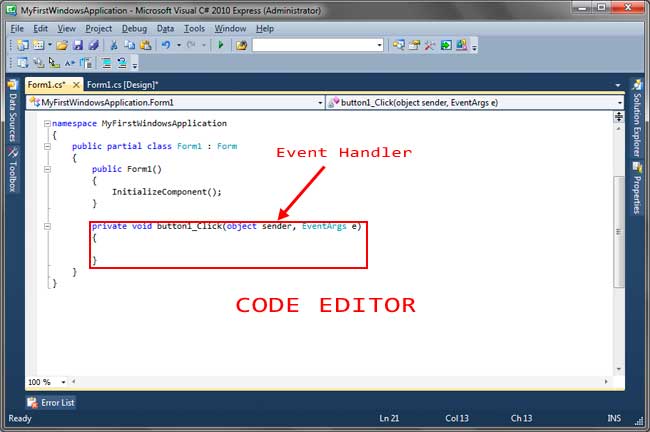
Don’t mind the other parts of the code as there will be a seperate lessons that discuss them. Type the following code inside the event handler. Please only type the code inside the event handler of the following code. I included the event handler so you can clearly see where to type the code.
private void button1_Click(object sender, EventArgs e)
{
MessageBox.Show("You clicked the button!");
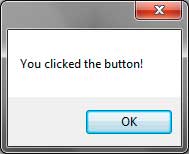
}The MessageBox class allows you to call a message box used to prompt user with messages and information. The Show method shows the message box with a specified message. You will learn more about the MessageBox class later. Run the program and click the button. You will be presented with a message window with the message you specified as an argument to the Show method.
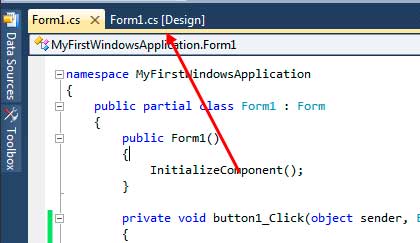
Another way of adding event handlers to events of controls especially for non-default events, is by going to the Properties Window. To demonstrate this, let’s add a Load event to the form. Go back to Design View by clicking the Design Tab, or using the Shift + F7shortcut.
Select the form in the designer then go to the Properties Window and find the Events button. It is represented by a thunderbolt icon. If it is not visible, be sure that a control is selected in the Designer.
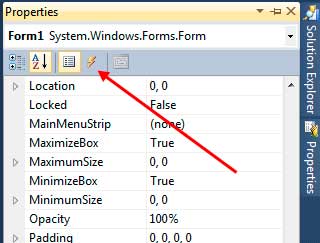
The Properties Window will now show a list of events for the selected control in the Designer. Find the Load event of the form. Clicking the combo box beside it will show you the list of valid methods for the event that exist in the code of the form. You can then choose which method to attach to this event. We can also create a new event handler by double clicking the selected event in the Properties Window. You will be taken to the Code Editor with the proper event handler created for you. Add the highlighted code.
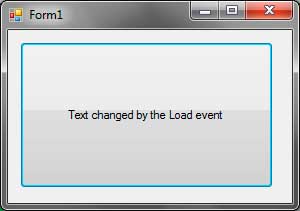
private void Form1_Load(object sender, EventArgs e)
{
    button1.Text = "Text changed by the Load event";
}
This statement will modify the Text property of button in the form. The Load event of the form occurs once the form is finished loading. So when you run the program once more, as soon as the program has finished loading, the text inside the button will be changed.