Exploring Visual Studio
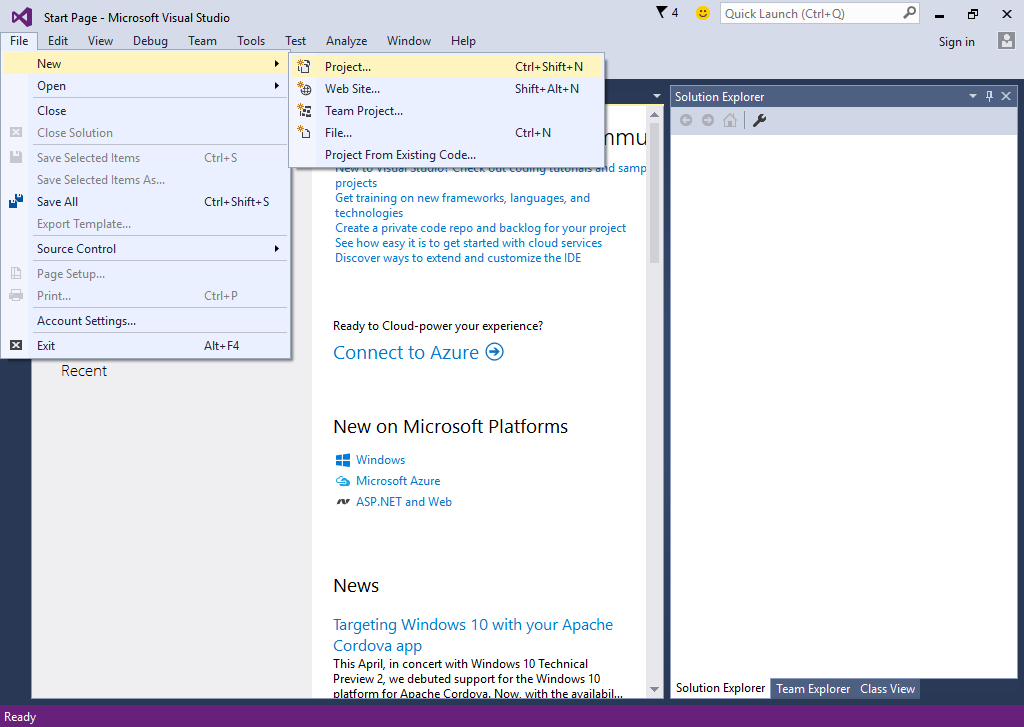
overview of visual studio IDE Visual Studio has numerous windows and components, each providing functionality or displays certain information. Let’s further explore the different parts of Visual Studio by going deeper into the IDE. Create a new Windows Forms Application by going to File > New Project or using the shortcut Ctrl+Shift+N.
You will be presented with the New Project Window as seen in Figure 2. The left section is a list of categories of installed templates. You can see that you can also create projects for other languages such as Visual Basic and C++ but we will only focus on C# projects in our lessons so click the Visual C# category.
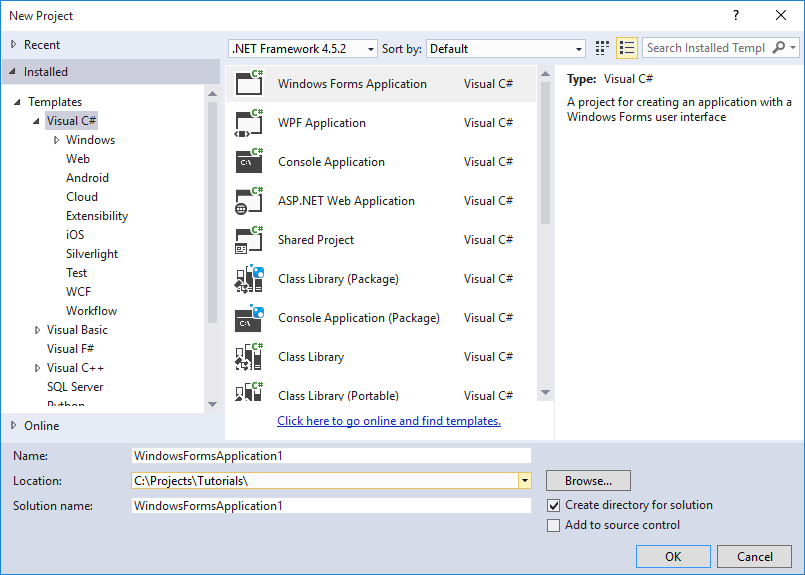
The center of the window shows the installed template for the specified category (Visual C#). Templates are pre-created project files which are available to you so you will not create them from scratch. All you have to do is create a project from a template and start developing applications. The number of templates listed varies depending on the templates installed in your computer. You can sort the name of the templates by ascending or descending order by using the combo box(drop down box) found at the top center. You can change the view of the templates by clicking the buttons next to that combo box. The right side shows a search box for searching installed templates and the description of the selected template. Choose Windows Forms Application from the list of templates. You can name your project using the text box found at the bottom. For now, leave it as it is. Specify the directory where you want your project to be saved. The Solution name is automatically generated when you type the Name of the project. You will learn more about solutions later. Leave the “Create a directory for solution” check box so it will create a dedicated directory for the project in the location you specified. Click OK to generate a project from the selected template.
The Designer
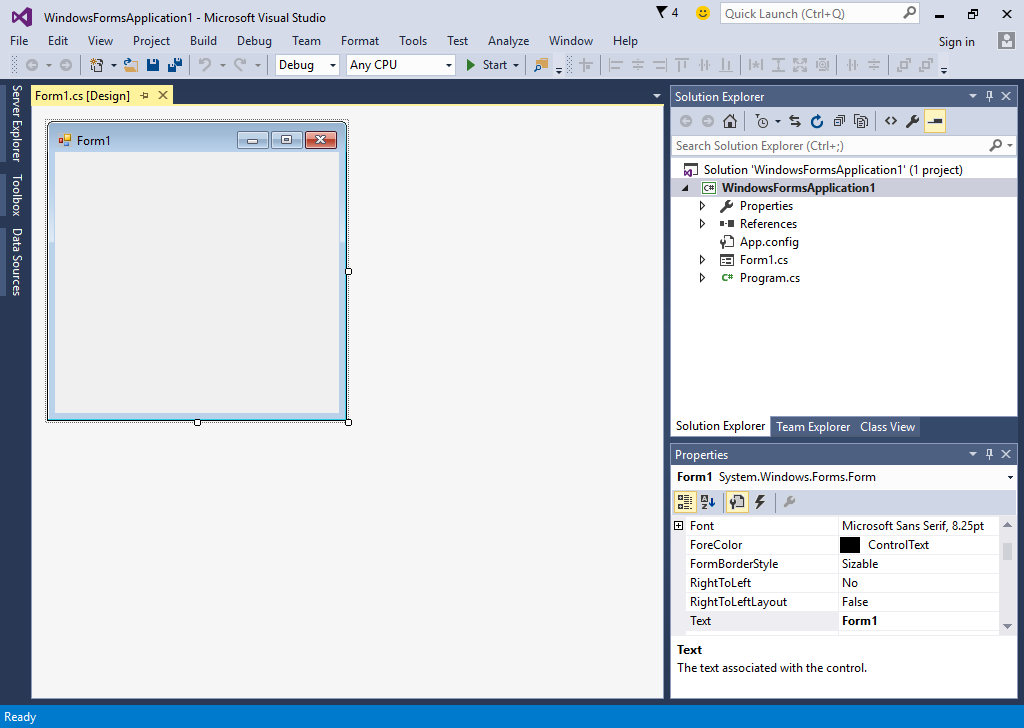
The Designer (1) is like your canvas or drawing area for designing windows forms. Windows forms are graphical user interfaces and you see them everywhere when you use computers. You add controls to the form such as buttons, text boxes, labels, and many more. A more detailed look at windows forms, controls, and visual programming is located at the Windows Forms Section of this site. But it is recommended to finish the basic and fundamental lessons first before creating windows forms application.
The Solution Explorer.
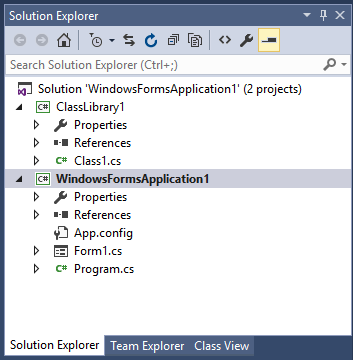
The Solutions Explorer (2) shows the different projects and the files associated with the solution. A solution represents the application you are creating. It may compose of a single project or multiple projects, and each project is composed of files such as source code files and images. When you create a project, a solution is automatically created containing the project you have chosen. If the Solution Explorer is not visible, go to View > Other Windows > Solution Explorer or you can use the shortcut Ctrl+Alt+L. If multiple projects are present, the project in bold text is considered the Startup Project which is considered as the default project and the one that will run when you start debugging (more on this later). If the project you want to execute is not the startup project, right-click the project in the Solution Explorer and then choose “Set as StartUp Project”. Below is that the resolution someone showing an answer with two comes. every project contains files and folders associated to them. Notice that the project set as Startup Project is written in daring.
The Properties Window
The Properties Window (3) shows the various properties or events of any hand-picked item like files, projects, the form, or controls. If it’s not visible to you, go to View > different Windows > Properties Window or use the cutoff F4. we’ll have AN in-depth discussion of properties and events in forthcoming lessons.
Properties can be considered as characteristics or attributes of objects. For example, a car has properties color, speed, size, and brand. If you are selecting a form or control in the Design View, or projects or files in the Solution Explorer, the Properties Window will show the properties available for them.
The Properties Window also allows you to view the events of a selected control or form. An event is something that happens when certain conditions occur such as when a button is clicked or when the text inside the textbox is modified.
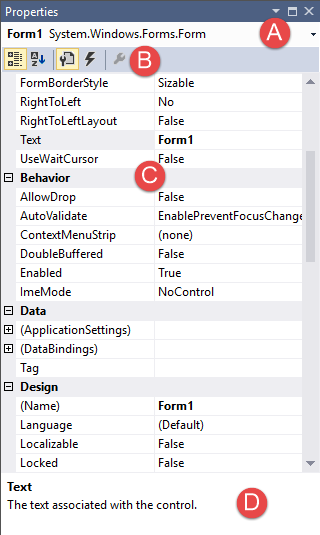 The top combo box (A) allows you to choose the object whose properties will be shown in the Properties Window. This is useful when you can’t select certain controls(probably because of their small size) in the Designer. Below the combo box shows some helpful buttons (B). Some buttons only appear on certain instances. The first button will arrange the properties in different categories. The second button will arrange the properties in alphabetical order. I recommend pressing this button as I found it easier to find the properties you want when it is alphabetized. The third and fourth buttons only appear when you are selecting a control or a form in the designer view. The third button allows you to view the available properties of the currently selected control or form. The fourth button (indicated by the thunderbolt icon) shows the available events for the selected control or form. The bottom box shows the description of the selected property or event.
The main part of the properties window (C) contains the properties or the events. The left column specifies names of the properties or event. The right column shows the values of the properties and events. There are simple properties that require a single value, but there are also complex properties that consist of more properties. These can be identified with a plus icon on the left of those properties. If you click that icon, sub properties of the property are shown. Some properties open up special tools or windows when normal text input cannot be accepted. The bottom part of the Properties Window is the Description Box (D) which shows a useful description of the selected property or event.