Timer Control
The Timer control (System.Windows.Forms.Timer) is used to execute commands for every tick of time which is specified with an interval. For example, if you want to print your name for every 5 seconds, then you can use the Timer control. The Timer control is a non-visual control and can be seen in the component tray after you drag it to the form from the toolbox.
The Timer control doesn’t have that many properties. The two properties that are most important are the Enabled and Intervalproperties. The Enabled property, when set to true starts the timer, and stops it when set to false. The Interval property specifies the interval time between calls to the Tick event, which is the default event of the Timer used to execute commands. Note that the value that is accepted by the Interval property is in milliseconds. If you give the value 5000 as the interval, then the Tick event will be called for every 5000 milliseconds or 5 seconds.
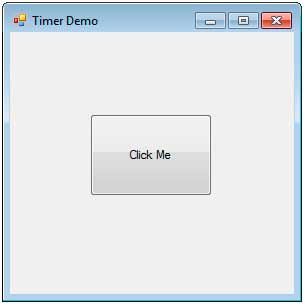
Let’s take a look at an example application of the Timer control. The following application has a button that will be animated to move up and down and bounce from the bounds of the client area of the form. Start by creating a new Windows Forms Application and naming in TimerDemo. Add a button control to the center of the form as seen in Figure 1.
Drag a Timer control to the form. It can be found in the Components section of the toolbox. You will notice that it now appears inside the component tray at the bottom portion of the Designer.
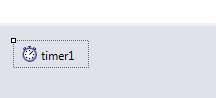
Figure 2
Select the timer control in the component tray and change its Interval property to 50 and it’s Enabled property to true so the animation will begin the moment the user runs the program. Double click the timer control to generate an event handler for its Tick event. Remember that this event handler will be called for every 50 milliseconds. Add the following class member that will hold the number pixels to move for every tick.
private int velocity = 5;Use the following event handler for the Timer‘s Tick event.
private void timer1_Tick(object sender, EventArgs e)
{
    if (button1.Top <= 0 || button1.Bottom > this.ClientSize.Height)
        velocity = -velocity;

    button1.Top += velocity;
}
The very first that the timer ticks, this handler will be called. It will first test if the button hits the topmost or bottommost corner of the form. To determine if the button hits the top corner, we used the Button.Top property which returns the Y coordinate of the top of the button. If it returns 0 or less, then it means that the button is or beyond the top bound of the client area of the form. Note that the coordinate system used by the form starts it’s origin from the top-left.
The second part of the condition in the if condition tests if the button hits the bottom bounds of the client area. We used the Button.Bottom property to get the Y coordinate of the bottom of the button. We then check if it exceeds the bottom of the form by comparing it to the Height of the client area of the form. We do this using the Form.ClientSize property and accessing its Heightproperty.
If any of the conditions is true, then we simply reverse the value of the velocity by using the – operator to multiply the value by -1. This would produce a bouncing effect. If the button is moving up (because it moves 5 pixels up), and it hits the top corner, then the velocity will be inverted and become’s -5. Moving -5 pixels up is equivalent to moving 5 pixels down.
Run the program and see the button bounce from the top and bottom corners of the form.